WK 07: Scanning Museum Artifacts, PBR Maps Cont.
These past two weeks I’ve been researching a more efficient workflow to create pbr maps, and was able to scan my first museum artifact! We took all of our camera equipment and setup a small station to scan the artifacts in a spare room that the museum provided.

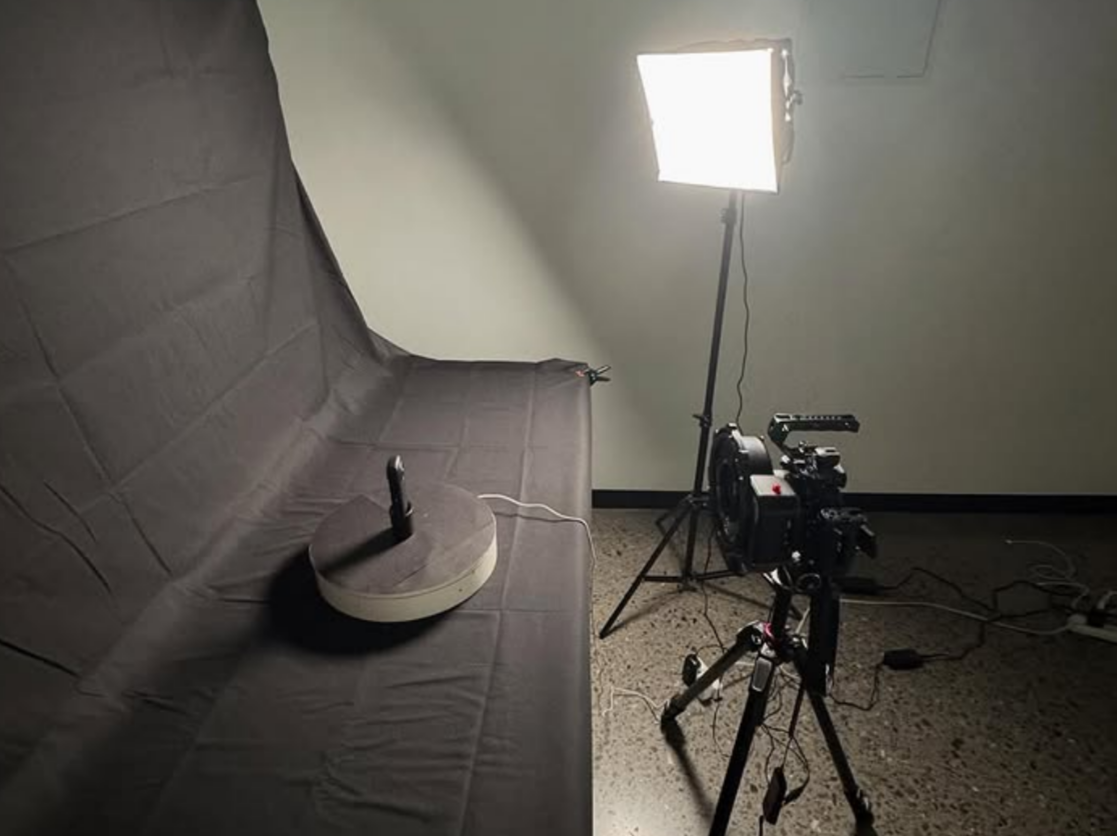
Station Setup
Here is our current setup! We have a table covered by a black backdrop with a turntable on top. The Sony a7iv camera is mounted on a ring flash on a tripod facing the turntable. To the side we have a modeling light that we turn solely for reference photos, and towards the back of the room (not pictured) we have a separate table where we place all of our items(color checkers, remotes, batteries, etc.)
Reference Photos
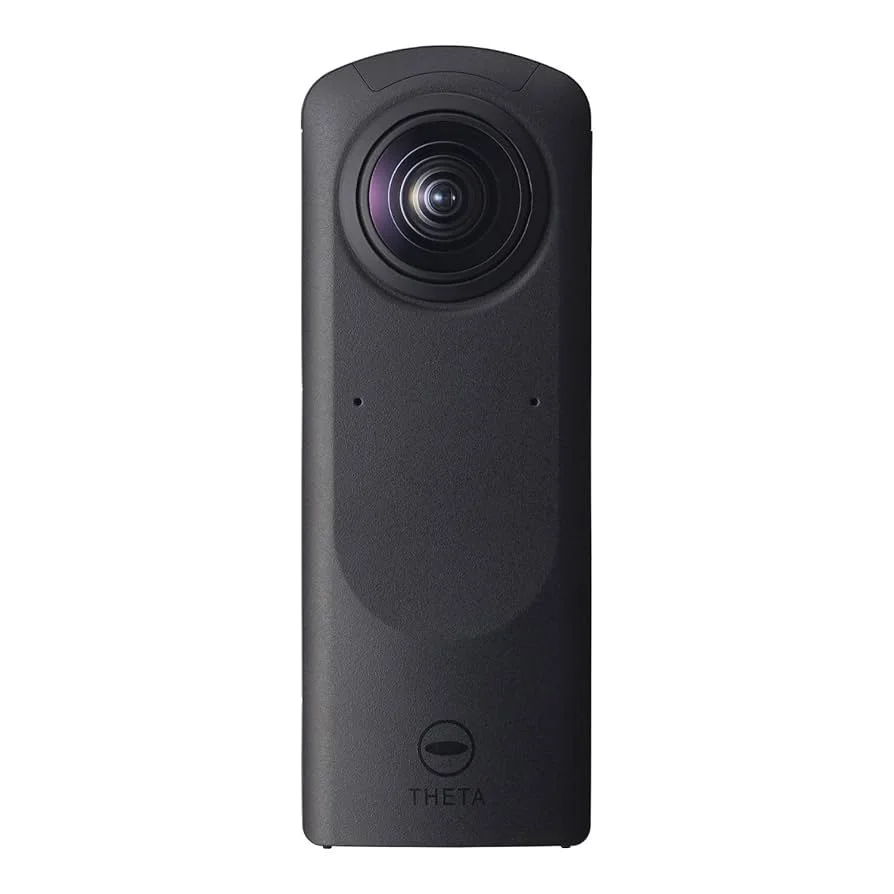
In order to accurately replicate the model digitally, we have to get reference photos to ensure the 3d scan looks correct. We took reference photos of the artifact using the modeling light(pictured above), and used a Theta Z1 dual camera sensor to take images of the room in order to create an HDRI image. I still need to check how to HDRI came out, but the setup is fairly simple. There is an app that you can download on your phone in order to use the camera and adjust its settings.
Lightroom Classic Workflow
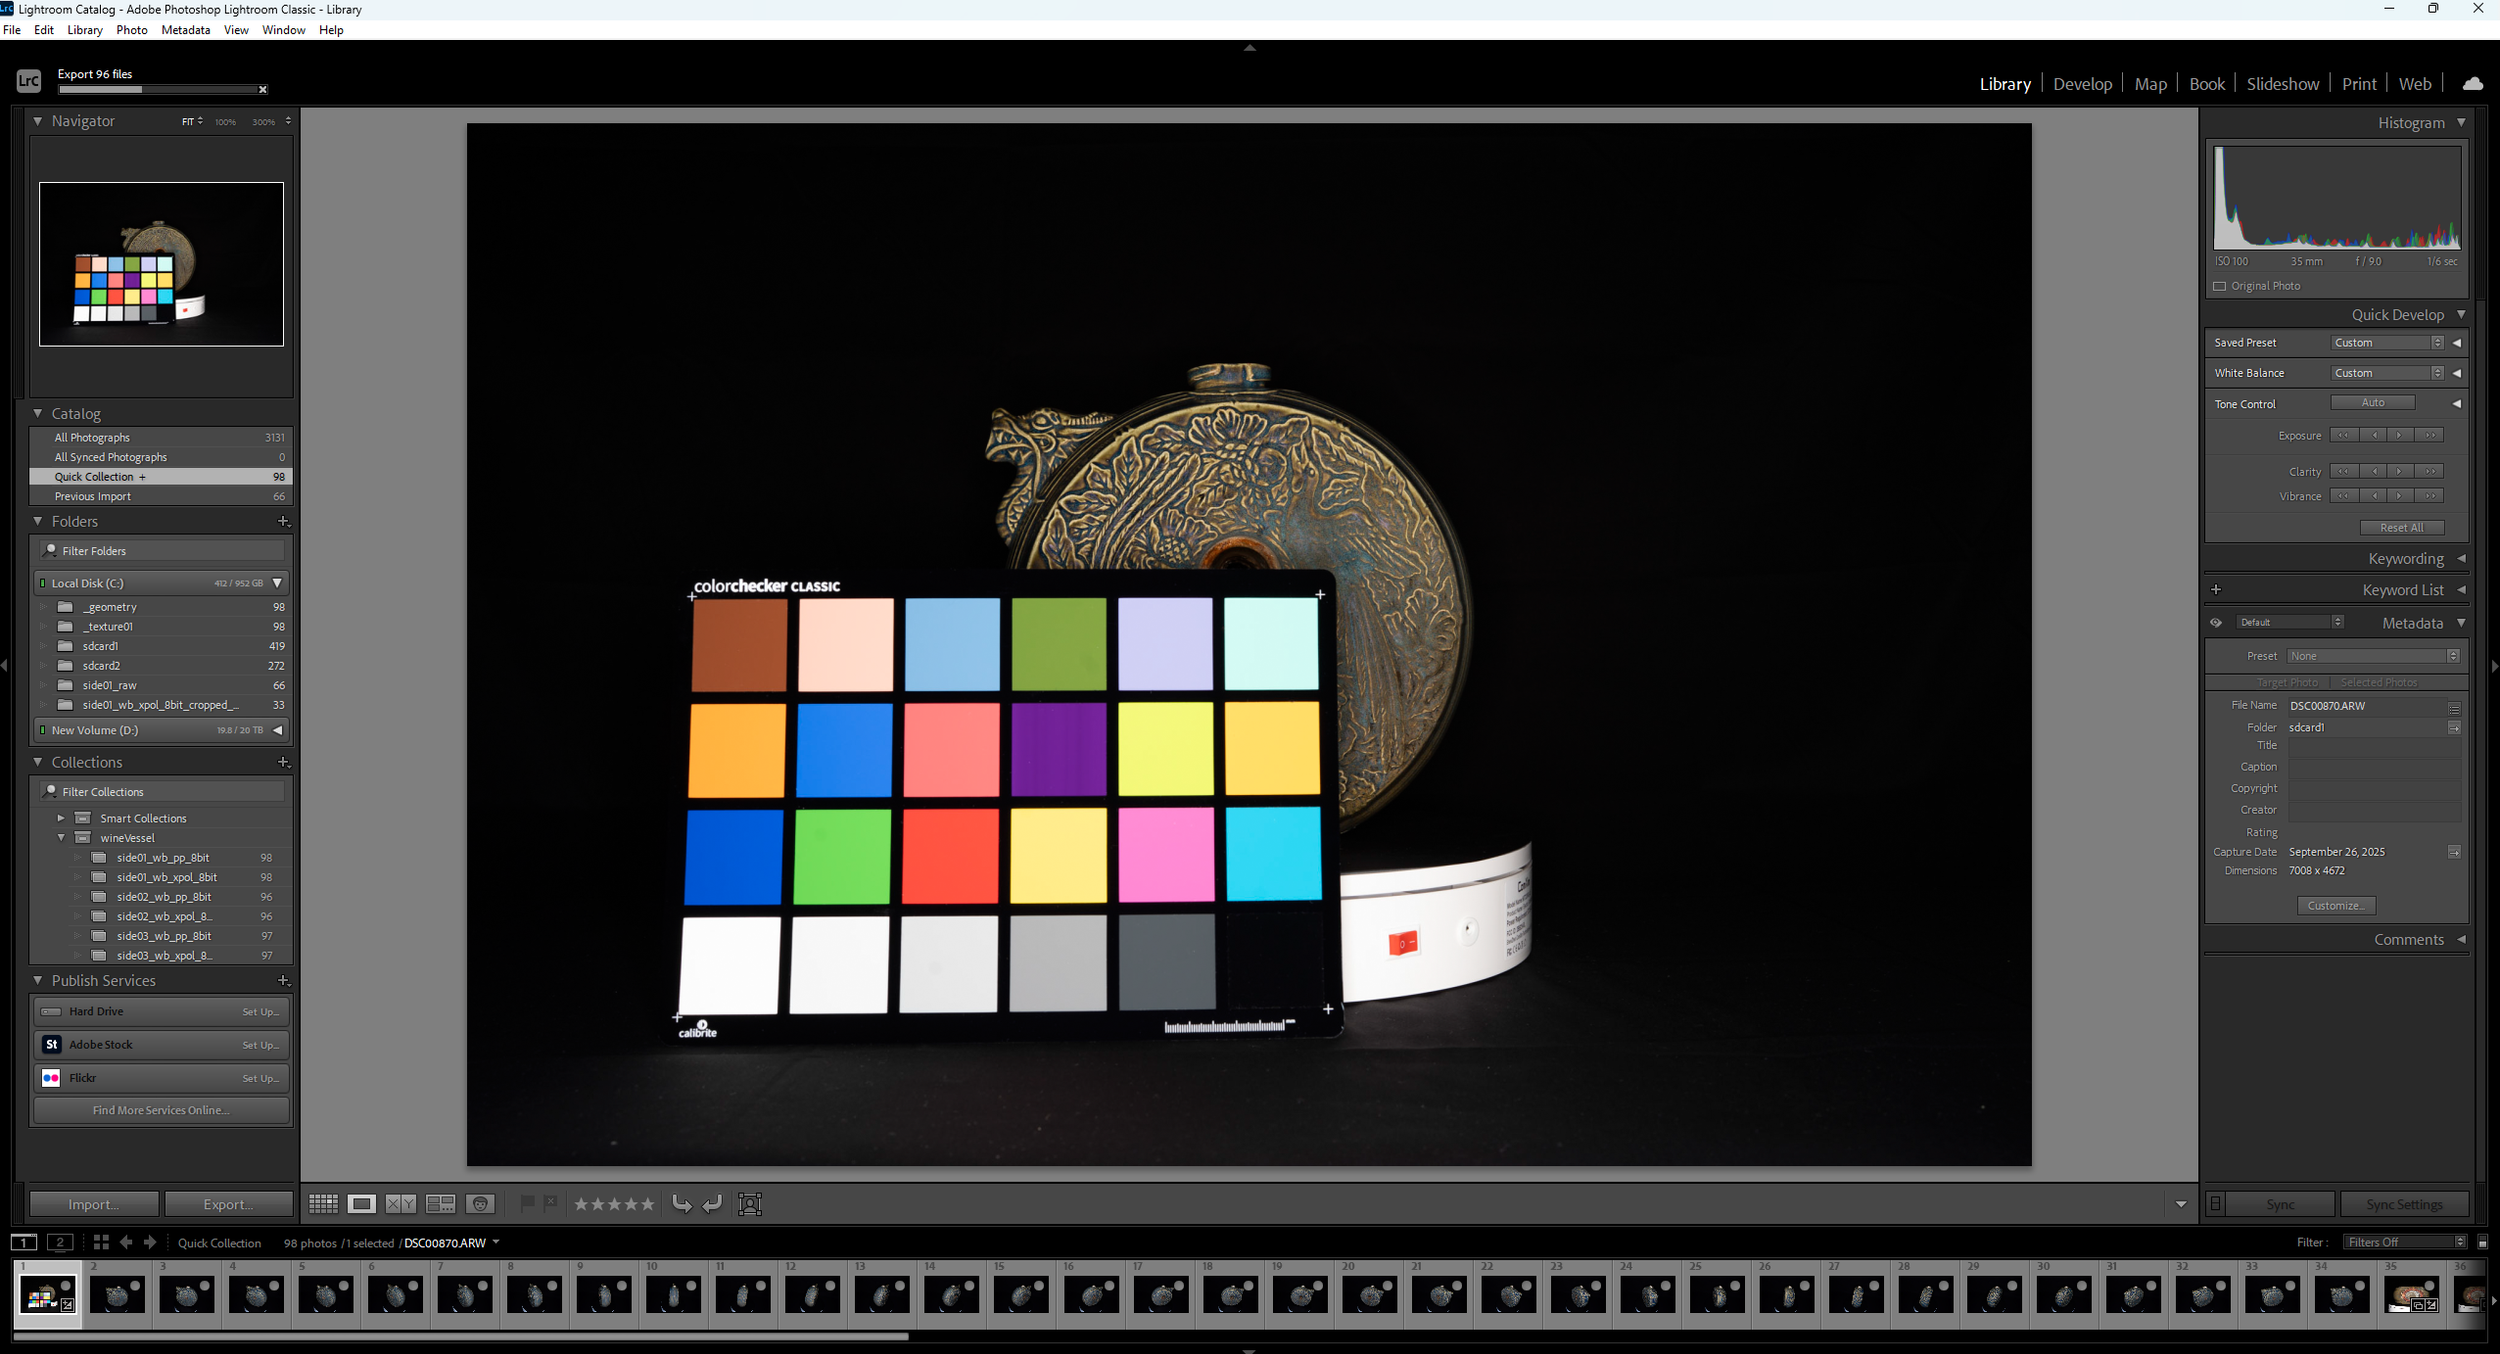
We took pictures of the artifact from several angles upright, and on its side in order to get the bottom. I then brought those images into lightroom and white balanced them using a color checker chart. Here I separate the Cross Polarized and Parallel Polarized images by using collections to make white balancing and exporting more efficient.
Specular Workflow (In Nuke)

Last time I had a hard time getting the two polarized images to line up exactly, so moving forward I now have to pause the turntable in increments and take a cross polarized and parallel polarized photo before moving to the next increment. I then bring the images into Nuke to subtract the cross polarized and parallel polarized images to get the specular. I’m thinking I could then invert my result to get the roughness, and use the image layering technique in Reality Scan to get each map. Using Nuke is a way faster process compared to using photoshop. With photoshop it took me about an hour and a half to do this process, despite using photoshop actions!
Image Layering Technique
We discovered that you can label folders to be _geometry and _textures and Reality Scan will know to solely use those photos for just the alignment or textures. This was great because it allows me to now upload multiple folders for textures and I can get textures for the specular and roughness maps.
First Test Scan of Wine Jar
This is a first pass of the scan in Reality Scan. I still need to finish exporting out the images for the specular and roughness maps, but so far its looking good and I have high hopes!